AN EXPLORATION IN WATERCOLOR GLASSLESS FRAMING
Montana Watercolor Society (MTWS) has been discussing the possibility of allowing glassless framing for entries into our member’s shows. This is a trend that is emerging around the country in different studios and art shows that allows the artist greater flexibility in framing options, particularly with larger pieces which can get expensive to frame and ship back and forth to galleries and shows. Most recently, there was an exhibit in New York City called “Breaking Glass” that ran from 7 September to 2 October 2021 at the Painting Center. The show featured 10 award-winning artists and was “about removing glass as a barrier to the viewer as well as breaking the glass ceiling of arbitrary values placed on a medium and not on the work itself”, according to Golden Artist Colors CEO, Mark Golden. Many people continue to place added value on oil paintings over works done in watercolor.
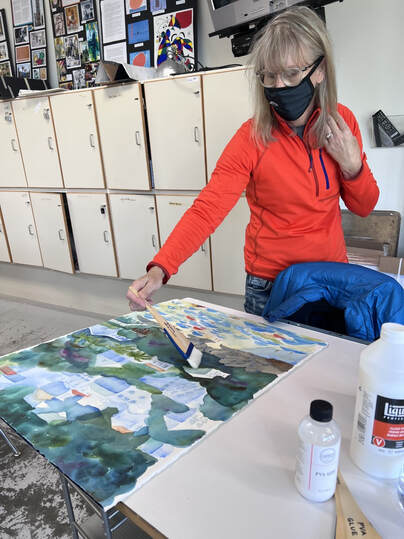
With this in mind, we decided to give it a try in Karen Leigh’s Watercolor Class at Flathead Valley Community College. With notes from Eric Wiegardt’s 2019 MTWS workshop and a full sheet painting, we tried it out with positive results. The consensus in the class was that this is a technique worth adopting!
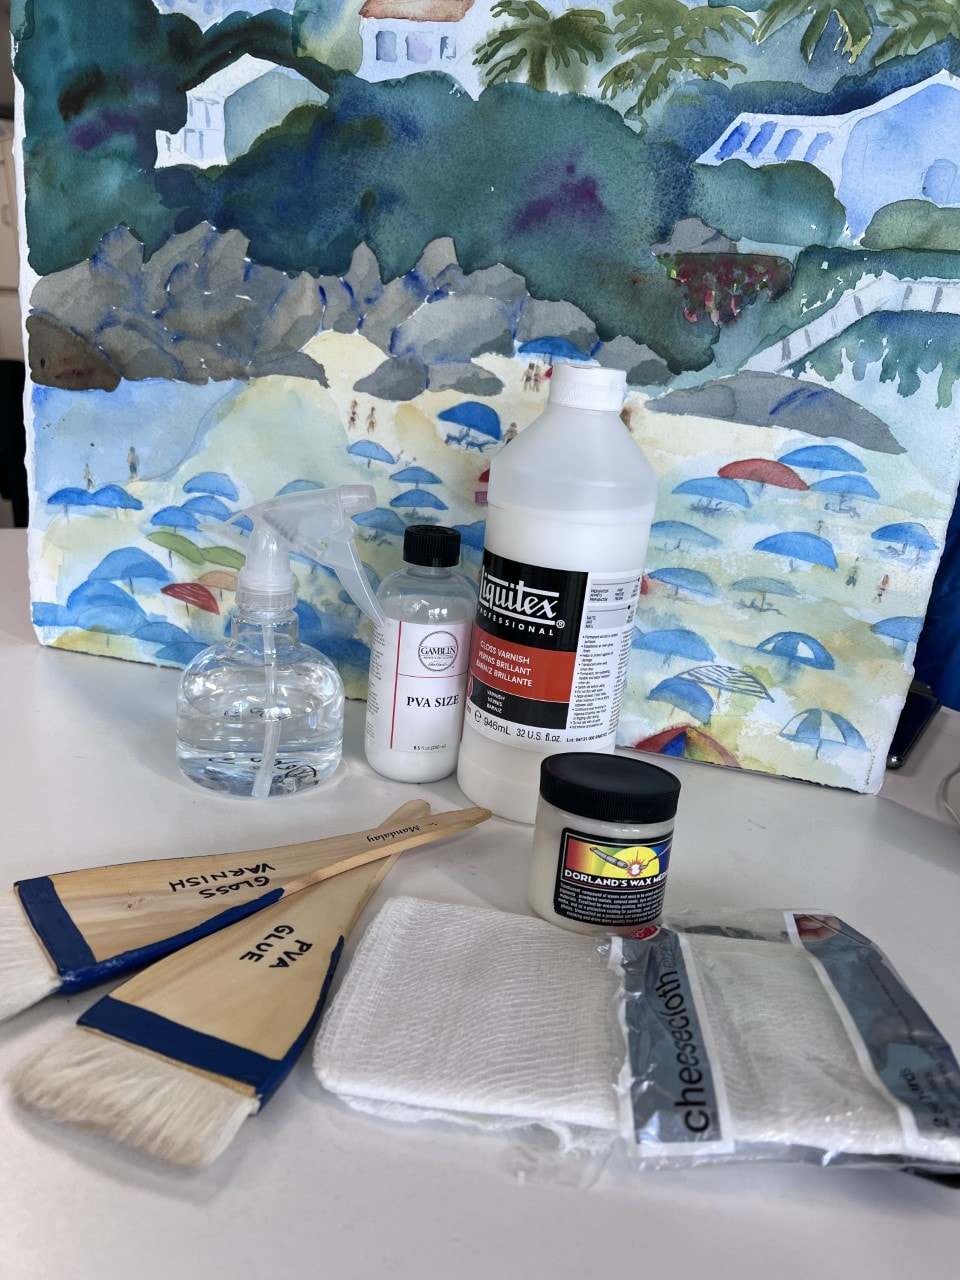
Materials: ¼ inch gator board or canvas, spray bottle with water, archival PVA glue, gloss varnish (Liquitex or any acrylic varnish), Dorland’s or Gamblin Cold Wax Medium, cheese cloth, cheap 3-inch soft bristle brush such as camel or goat hair
Technique Used:
-Spray water onto both sides of the painting to help the paper relax (it won’t hurt a dry painting)
-Put glue onto the board (Lift one side of the painting and apply glue, lay painting onto glue, and repeat with the other half. There is no need to press the paper onto the board manually)
-Lay another piece of watercolor paper on top of your painting and place books on top to dry overnight
-Next day: Brush the varnish onto the painting with the 3-inch soft brush recommended above (we used one part varnish to 2 parts water). ONLY stroke once or it could ruin the image. Don’t worry about missing spots. Let dry for three hours and then repeat the varnish process to catch spots that you may have missed. There could be some buckling during varnishing, but it will dry flat. At this point, the image will be locked in. Apply Cold Wax Medium with a cheesecloth to the varnished canvas to eliminate areas where the varnish may have pooled.
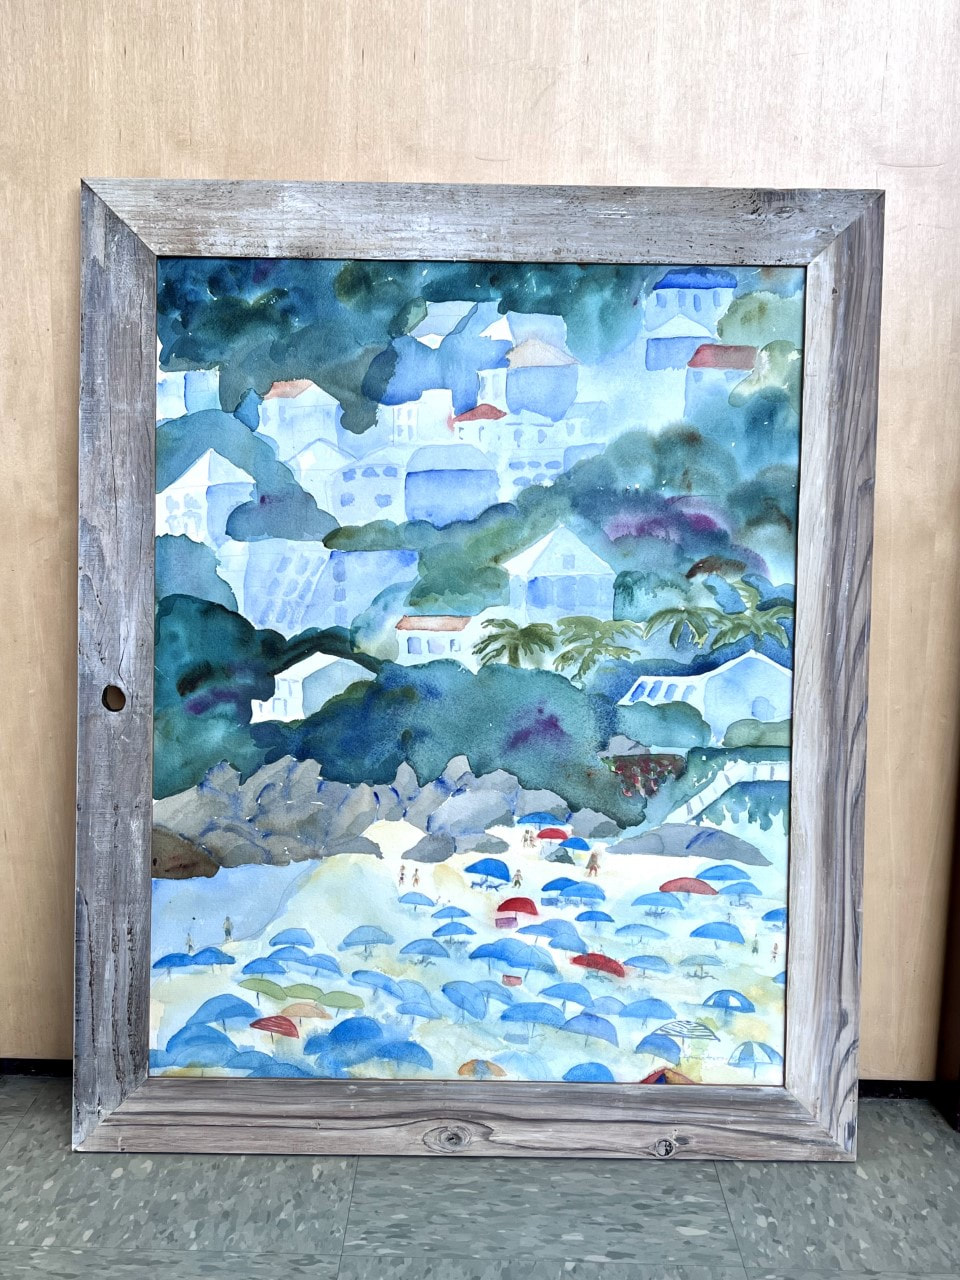
-The painting can now be framed without matting or glass unless desired.
I have a $60 frame on order for the 28” x 22” piece so the investment in the framing process and materials is well under $100. Worth a try and I think you will be pleased with the results, the cost, and the glowing appearance of the final product.
Janet Bristol
MTWS Vice President


 RSS Feed